
Targeting
The targeting screen is where the weapons are fired from. Targets are objects or ships which can first be targeted and then fired at. Weapons will not hit an object unless the object is first targeted.
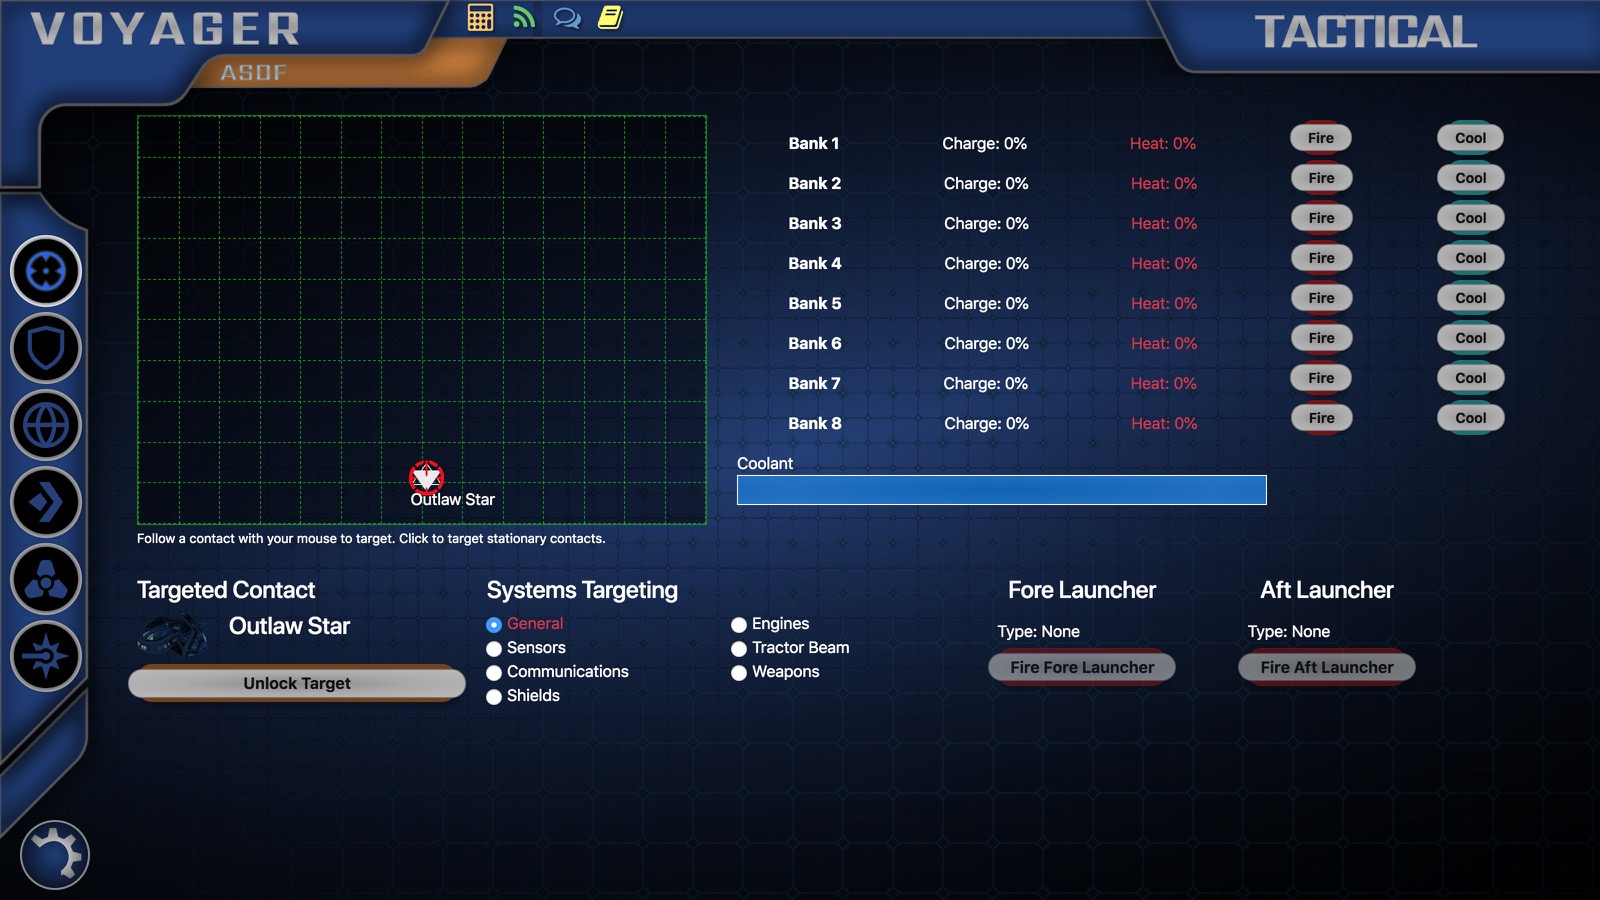
The targeting screen has four sections: The targeting grid, the target details, the phaser banks, and the torpedo launchers.
Targeting Grid
The targeting grid shows all of the contacts that can be targeted and fired at. The icon and label identify each one. Unless stationary, contacts move around in a random fashion. Moving the mouse cursor over the contact will eventually target it (stationary contacts must be clicked/tapped).
When a contact is targeted, the image and label of the contact appears below. Optional system targeting also becomes available.
Coordinate Targeting
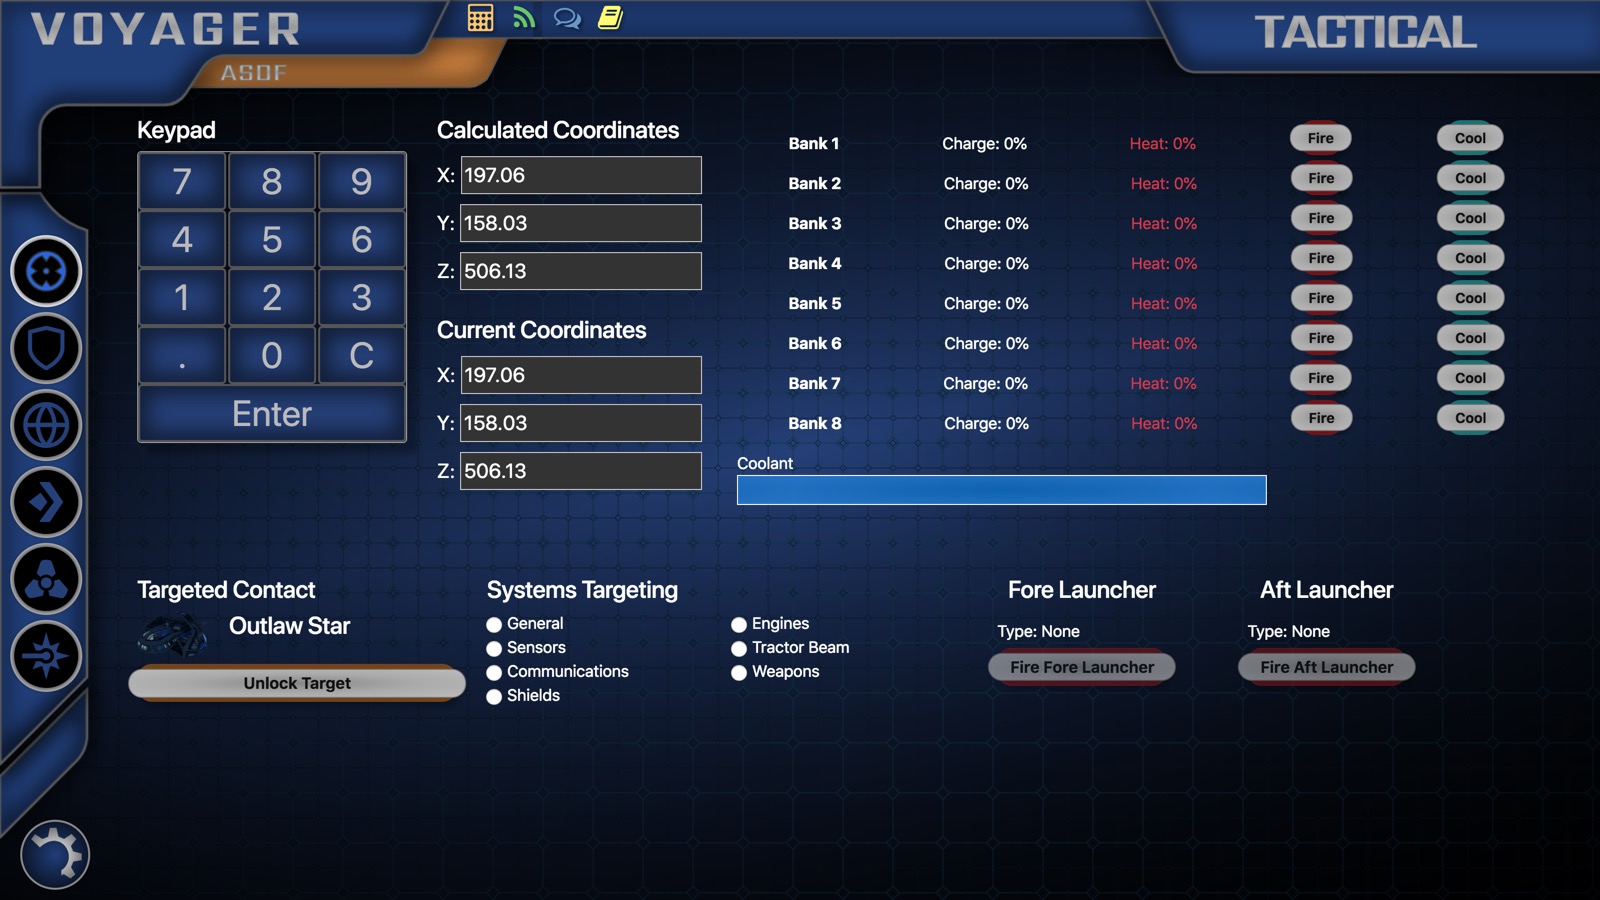
The targeting screen also allows for targeting using coordinates. Coordinates are calculated and sent to Tactical when Sensors clicks on a contact on their sensor grid. Potential targets do not have to be in weapons range. Contacts are targeted once the coordinates for the target have been typed in, either with the on-screen keypad or with the keyboard.
Phasers
On ships that have more than two phaser banks, the phaser banks appear in a list. That list includes the current charge and heat levels, and buttons for firing the phaser bank and cooling the phaser bank with coolant. Phasers must be charged from the Phaser Charging screen.
Firing the phaser bank heats it up at a rate of 50% ie. one full charge heats it to 50%. If the phaser bank gets too hot, it will not fire. Phaser banks also have a cool-down time where they cannot be fired for a few seconds after firing.
Torpedos
On ships with more than one torpedo launcher, torpedos appear in a grid. That grid shows the currently loaded torpedo and a button to fire it. That's it.
Small-ship Layout
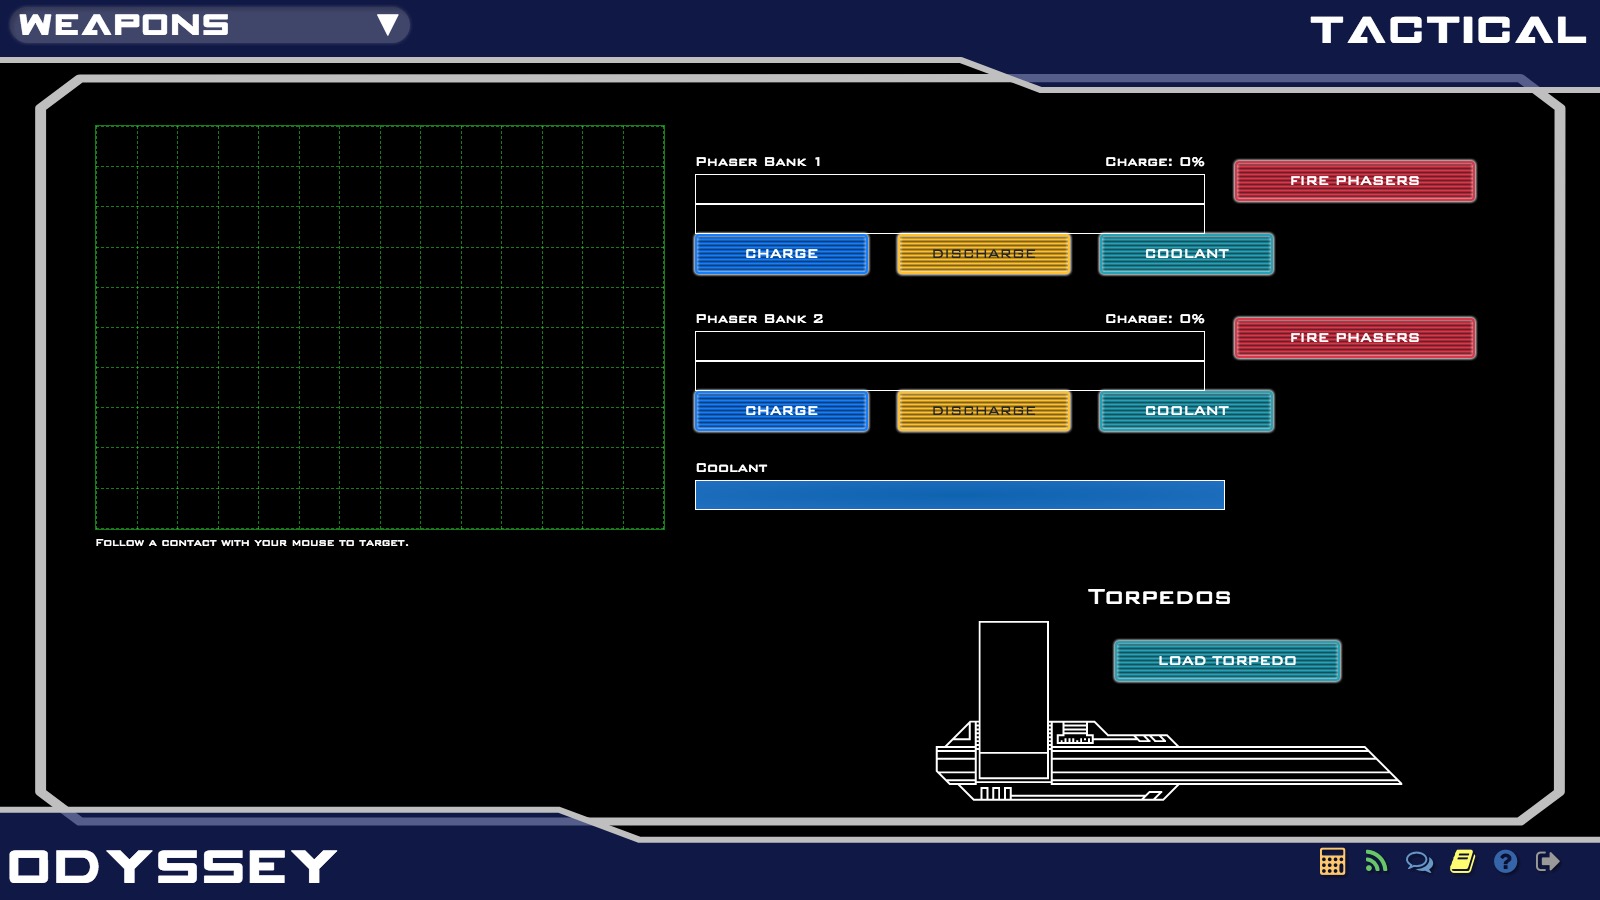
On ships with 2 or less phaser banks and 1 torpedo launcher, the configuration of this screen is different.
The phaser's charge and heat is shown graphically. Buttons for charging and discharging the phasers are also available from this screen.
The torpedo launcher is shown with the torpedo loaded in it. It also allows for a torpedo to be loaded by clicking 'Load Torpedo' and then choosing the torpedo from the list. See Torpedo Loading for more information.
Core
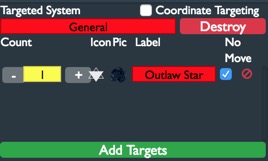
Targets are added based on classes of targets that are preconfigured. This allows you to add a lot of targets of the same variety.
Target classes are created by clicking the green 'Add Targets' button. You can then change the label, icon, and picture and choose if the contact will move or be stationary. The red delete button removes the contact.
Contacts are added to the targeting grid by clicking the '+' or '-' buttons or by clicking on the number and typing in how many contacts you want to show.
When a contact is targeted, the targeted system at the top will turn red as well as the label field for the class of contact that got targeted. Clicking the red 'Destroy' button will remove the targeted contact with a small explosion.
Coordinate targeting removes all of the controls until a contact is targeted. Then, the information about the contact is displayed on the core.