
Sensors
Sensors is easily one of the most complicated, neuanced screens in Thorium.
The main sensor grid card has three main features:
-
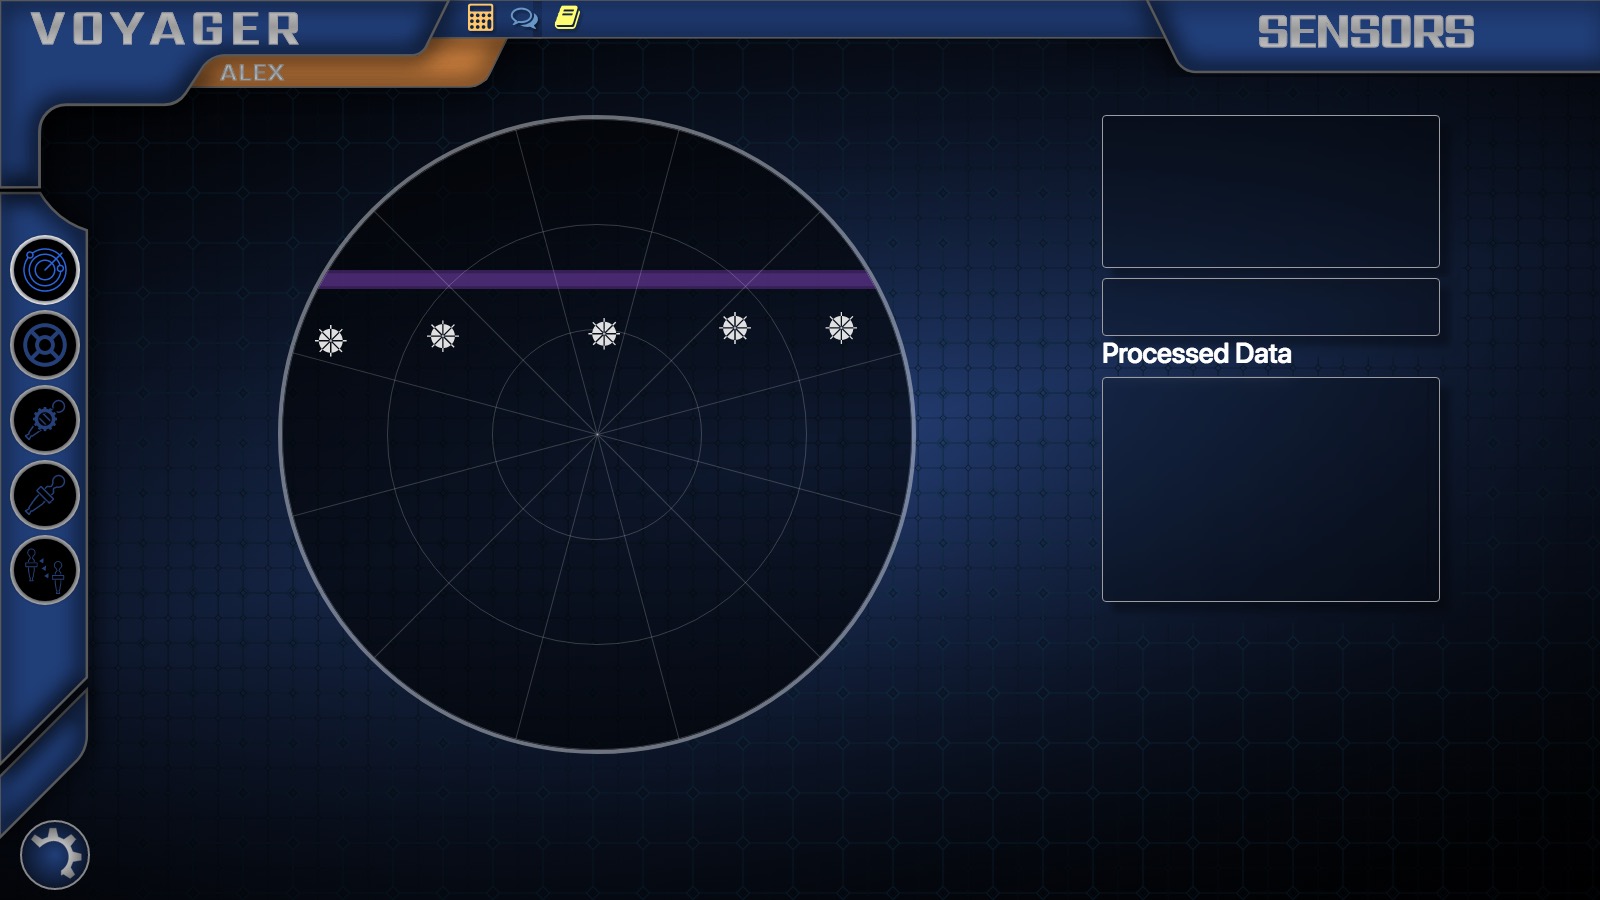
The sensor grid. This is a representation of the area immediately surrounding the simulator. In the center is where the simualtor is located, with the sensor grid extending an undefined distance away in all directions. The rings can correspond to certain distances, such as weapons range, communications, range, transporter range, etc. None of those ranges (other than weapons, with Add to Targeting enabled) are defined in the controls though - it is up to the Flight Director to allow their use.
-
The contact details area. This is the two boxes in the top right. The top one shows an image of the contact. The lower one shows the contact's label or identifier. These show up when a contact is hovered by the mouse or clicked/tapped.
-
Processed data is information which the sensors system gleans ambiently. This information is relayed to the sensors officer to alert them to things that aren't apparent from the sensors grid alone. For the Flight Director, this box is used as a secondary way to relay story-centric information other than through a character, like the main computer or chief engineer. For information on sending processed data, refer to the [Sensor Scans core](/docs/cardsensorscans).
The sensors grid card also supports an alternate layout. This layout only appears when a) the 'Sensor Scans' card is not present on the station and b) the simulator does not use history-based scanning.
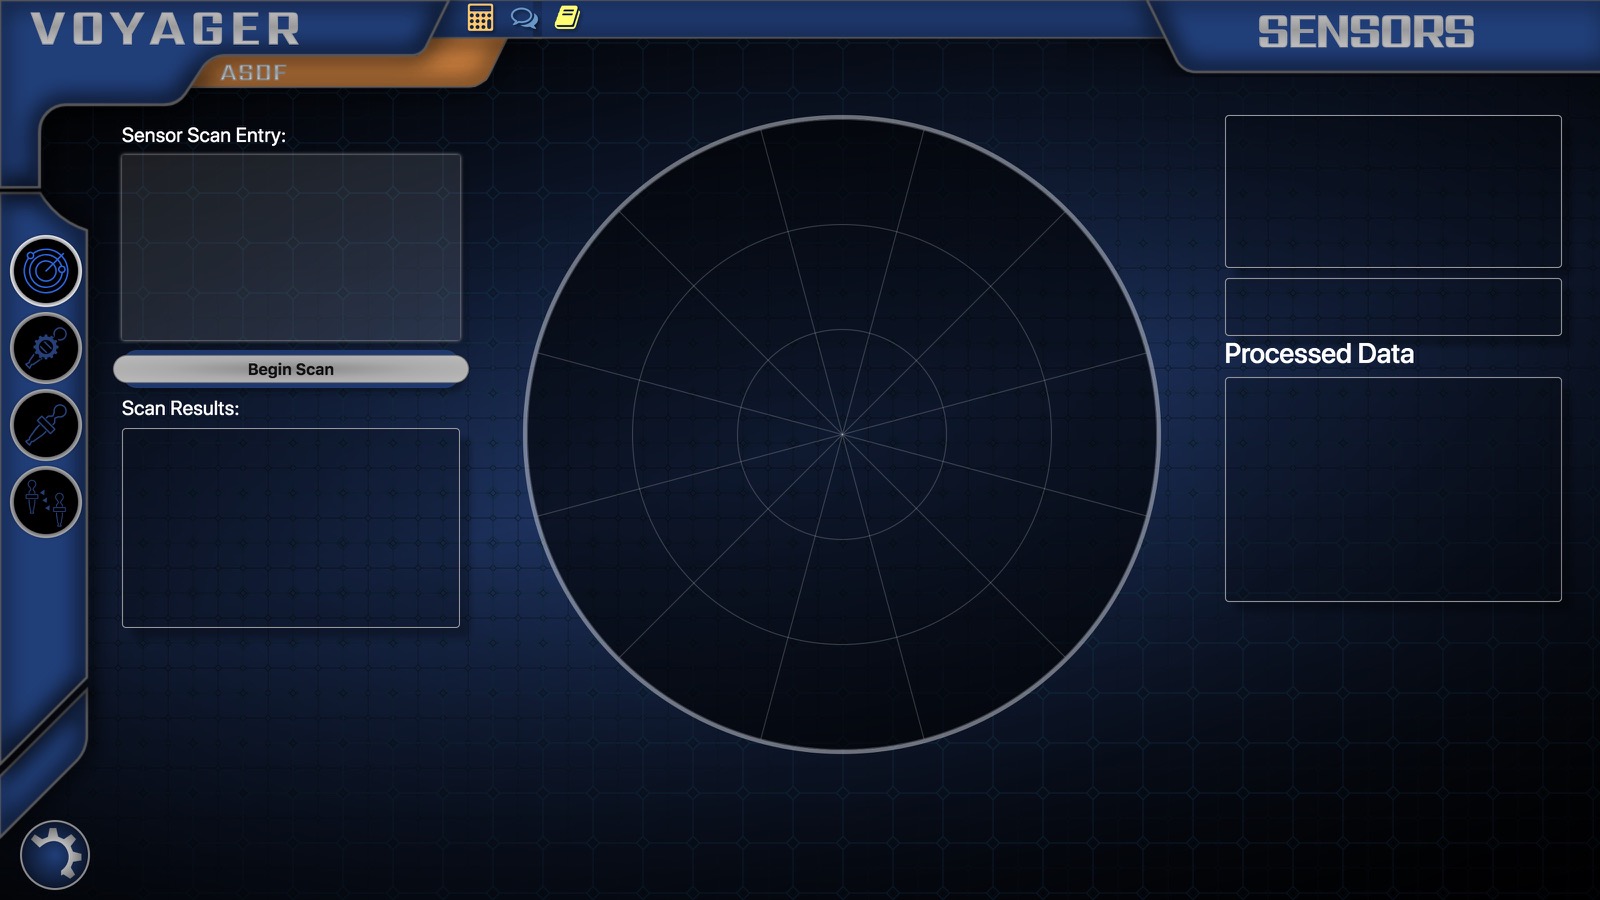
This screen is nearly identical, save for the sensor scan entry and results fields. Scans are requests made to the sensors system for additional information. They are typed in the upper field on the right. Once the sensors scan has been responded to by the Flight Director, the answer appears in the bottom field.
Core
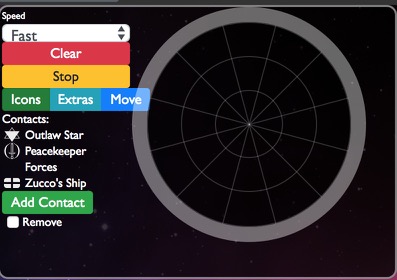
The core is divided into two sections: the config area and the grid itself. The grid is a 1-to-1 analog of the grid shown on the crew's station.
The config area has three parts. The first is the contact config area. Sensor contacts available to place on the grid are shown here. You can drag the contact icon from this area onto the grid to have it appear on the crew's grid. You can then drag the contact around on the grid to make it move. You can drag as many contacts of any type to the sensor grid as you want.
The green 'Add Contact' button will add a generic contact to your list. The 'Remove' checkbox makes red delete buttons appear so you can remove contacts from the list.
Contact Config
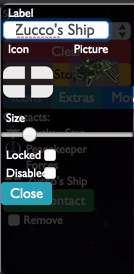
You can right-click on the contacts in the contact config to configure them. This allows you to change the label, icon, and picture, the size of the contact on the grid, and whether the contact is locked (or unmovable) or disabled (which appears as though static was on the contact). Dragging on the sensor grid over one or more contacts also gives you this menu, with one addition: Destroy will cause the contact to disappear in a small explosion.
Extras
The extras menu gives you several additional options for the sensor grid.
Nudging moves all sensor contacts (except those that are locked) in one direction, including rotating around the center. The nudge distance specifies how much the nudge will move the contacts. Clicking the arrow buttons repeatedly moves the contacts in that direction.
Ask for Speed makes it so dragging contacts does not move them until a speed has been chosen from a drop-down menu. Unchecked, the speed of the contact is determined from the dropdown menu at the top of the config area.
Add to targeting makes contacts automatically appear on the targeting grid if the contact is within the center circle of the sensor grid.
Auto Thrusters makes contacts move automatically based on the thruster movements of the ship. Speeds for those movements are controlled from the Thrusters core.
A small note indicates that you can option-click on segments of the grid to black them out. No contacts appear when that grid segment is blacked out.
You can add planets and borders to the sensor grid, just like regular contacts. Planets and borders have no label, but color and, in the case of planets, size can be adjusted. Planets are added by dragging from the colored circle. Borders are from the colored square.
Interference adds noise to the sensor grid, useful for indicating high radiation or other distrupting influences. From 0% to 50%, contacts on the grid are still mostly visible and can be clicked or hovered to see their identification. After 50%, the grid is too full of interference to be able to identify contacts.
Move
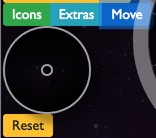
The move menu shows a small circle with another circle in it. This allows you to move all of the contacts (except locked contacts) continuously in any direction. Just drag the center circle in the direction you want contacts to move. The distance from the center adjusts the speed at which the contacts move. The reset button will re-center the circle and stop movement.
Working with the Grid
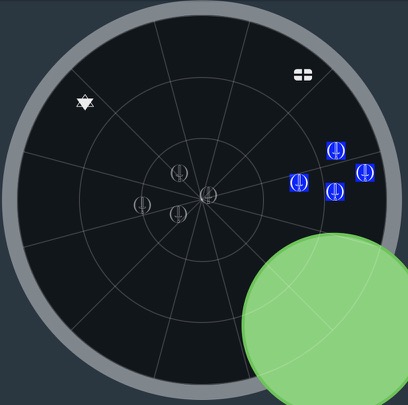
This shows a scene in action, with several contacts and a planet. The contacts hilited in blue have been selected. The ghosted transparent contacts indicate what is being shown on the crew's computer as the icons move across the grid. Bear that in mind as you use the sensors core.